







A dynamic neck assessment is what separates an injector who treats a photograph from an injector who treats a patient. A neck at rest, in one position, under overhead light, hides almost everything that will determine whether your submental result satisfies the person in the chair. Bands hide at rest. Gland ptosis hides at rest. Redundancy hides at rest. Baseline smile asymmetry hides at rest — and that one hides until the day you need it most.
You plan the treatment from anatomy, not from hope. The examination below is how you get the anatomy.
Maritza Mejia, FNP — family nurse practitioner; faculty member, Empire Medical Training; founder of Long Island Beauty Bar, New York.
The sequence
Four positions, then palpation, then photography, in that order. It takes under three minutes once it is a habit.
- At rest, seated upright, head neutral, jaw relaxed, mouth closed.
- On animation — a full smile, then a deliberate grimace or neck tensing.
- In flexion — chin towards the chest.
- In extension — chin elevated.
The static pinch test sits inside position one. It is the go/no-go gate on whether treatable fat exists at all, and it is a technique worth learning properly on its own terms. What follows is everything the pinch cannot tell you.
Position 1: at rest
What you are looking for: the baseline. The cervicomental angle, the definition of the jawline, the shape and symmetry of the convexity, and the position of the midline fullness relative to the hyoid.
Assess from three views — frontal, 45° oblique, and true profile. The profile is where the cervicomental angle lives, and the angle is what most patients are actually complaining about even when they describe it as a double chin.
What it rules in: fat volume, gross asymmetry, the severity grade you will later compare against.
What it hides: almost everything else. Relaxed platysma does not band. A ptotic gland is partly camouflaged by fat. Redundant skin lies flat. This is the position in which an unsuitable patient looks most suitable.
The pinch belongs here. Relaxed, upright, thumb-and-index, assessing the thickness of the fold across the whole footprint rather than once in the midline. If there is no pinchable fold, the rest of the examination is academic — but do it anyway, because the reason there is no fold is what you will be explaining to the patient.
Position 2: on animation
Two separate manoeuvres, and clinicians routinely do only the first.
The smile
Ask for a full smile and watch the corners of the mouth. You are documenting baseline symmetry of the lower lip depressors, because marginal mandibular nerve paresis occurred in 4% of treated subjects in the pivotal trials and presents as exactly this: an asymmetric smile on the affected side, with the corner failing to depress. Cases resolved spontaneously, but with a median of 44 days and a range out to 298 days.
Many people have a small pre-existing asymmetry. If you did not record it, you cannot later distinguish it from an injury. A photograph of a smiling patient taken before treatment is one of the highest-value thirty seconds in this entire procedure.
The tensed platysma
Ask the patient to grimace, clench the teeth and pull the corners of the mouth down and back, or simply to "tense your neck like this" and demonstrate. The medial edges of the platysma will cord if they are going to.
Bands that appear here and disappear at rest are a muscular problem, not a fat problem. They are a chemodenervation question. And they are a warning: reducing the fat that partly camouflaged them can make them more conspicuous at rest afterwards, which the patient will read as a new problem you created. This is the same static-versus-dynamic distinction that governs the rest of the face, and the principle transfers directly — see dynamic versus static wrinkles for the general framing, and Botox injection sites for orientation to where neurotoxin is used in this territory.
Platysmal contraction also serves a technical purpose later. The label's injection technique has the patient tense the platysma while the operator pinches the fat, precisely because tensing firms the floor of the compartment and makes the pre-platysmal plane tactile. Practising the manoeuvre at assessment means the patient can perform it reliably on treatment day.
Position 3: flexion
Chin to chest. This is the position that exposes skin redundancy — and it is the one most injectors skip.
Flexion shortens the distance between mandible and sternum and forces the envelope to accommodate. A neck with adequate skin tone takes up the slack. A lax neck produces visible folds, creases and rolls that were invisible thirty seconds earlier.
What it rules in: true laxity, and its distribution. Some patients are lax only in the submental midline; some are lax across the whole anterior neck.
Why it changes your plan: a patient who folds dramatically in flexion is a patient whose envelope is already too large for its contents. Reduce the contents and the drape problem becomes the dominant feature. A 12-month open-label study found that 82.9% of subjects had unchanged skin laxity and 10.1% had improved laxity at 12 months relative to 12 weeks after last treatment — so laxity generally holds rather than worsening. But "holds" is not "improves," and a laxity-dominant patient will not be satisfied by a fat reduction. The label itself directs careful consideration in patients with excessive skin laxity because fat reduction may produce aesthetically undesirable results. That conversation, and the alternatives such as thread lifting for a double chin, belong here.
Position 4: extension
Chin elevated, neck extended. This is the diagnostic position for everything that is not supraplatysmal fat.
Platysmal bands become prominent under stretch even without deliberate contraction in many patients.
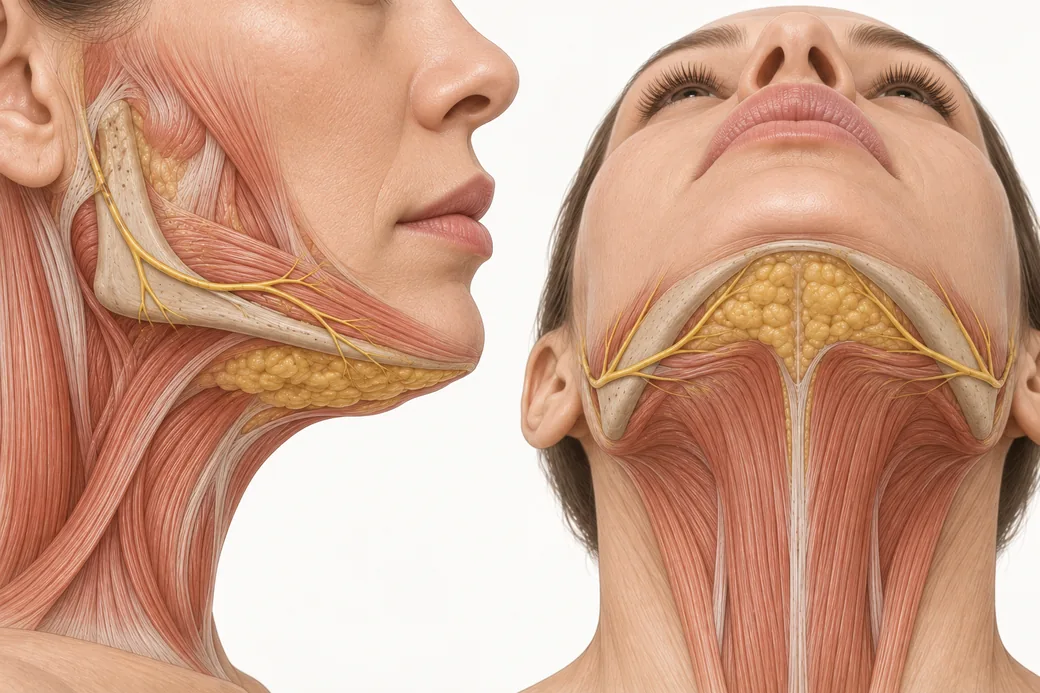
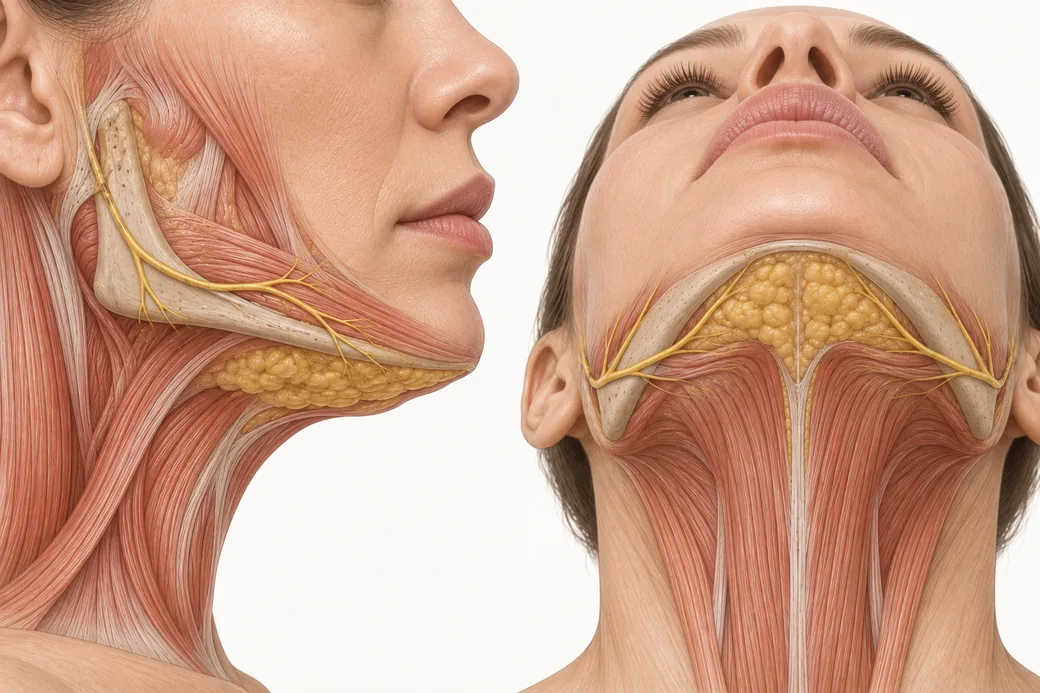
Submandibular gland ptosis declares itself. In extension, a low-lying gland presents as a discrete rounded fullness below and behind the mandibular angle, separate from the midline convexity. Cadaver data attribute on average 24.5% of neck "fat" volume to the submandibular gland — a quarter of the apparent problem, in a structure the label instructs you to stay 1–1.5 cm away from.
Hyoid position becomes assessable. A high hyoid gives a crisp cervicomental angle in extension; a low or anterior hyoid blunts it regardless of fat volume. This is skeletal, it is not modifiable by injection, and it sets a ceiling on your result that must be named before treatment rather than explained afterwards.
True preplatysmal fat drapes and redistributes under stretch in a way that firm structures do not, which is a useful confirmation of what the pinch found.
Palpation: the step that names the structures
After the four positions, palpate with flat fingers across the whole submental and submandibular field. The pinch tells you how much mobile soft tissue there is; palpation tells you what else is in there.
| Finding | Character | Implication |
|---|---|---|
| Supraplatysmal fat | Soft, compressible, lifts into a pinch, regionally uniform | The target |
| Submandibular gland | Firm, lobulated, fixed, below and behind the mandibular angle, will not pinch | Not the target; maintain 1–1.5 cm clearance |
| Lymph node | Discrete, round, mobile, rolls under the finger | Screen before you treat; the label names cervical lymphadenopathy as a cause to exclude |
| Thyroid enlargement | Midline, low, moves on swallowing | The label names thyromegaly as a cause to exclude |
| Scar or prior surgery | Firm, tethered, distorted landmarks | The label cautions that altered landmarks and scar tissue may affect safety and outcome |
A swallow is a free discriminator: ask the patient to swallow while your fingers rest on the midline. Thyroid tissue moves with the larynx. Fat does not.
Photography: the record that makes the rest usable
Take standardised views before every session, not just the first. The label requires palpation before each treatment to confirm sufficient submental fat; photographs are what let you compare across sessions rather than rely on memory, and they are what let you and the patient read a result honestly through resolving oedema.
The requirements are unglamorous and unforgiving: identical distance, identical camera height, identical head position, identical lighting, identical background, no smiling in the neutral series — plus one smiling series for baseline symmetry. Follow your practice's canonical clinical photography protocol rather than improvising; the value of this record depends entirely on the consistency of the views.
Consent sits at the end of the examination, not the start
Consent written before the examination is a form. Consent written after it is a plan. By this point you can tell the patient what you found, what fraction of their concern is treatable with this drug, what is not, what the swelling will look like, and how many sessions the anatomy suggests. A patient who has heard that conversation is a patient who will interpret week-one swelling as progress rather than damage.
Maritza's AMPLE sequence
The mnemonic I teach to keep the order straight:
- A — Assess the anatomy. The four positions and the pinch. Confirm the patient is a candidate before anything else.
- M — Map the face. Mark danger zones first, then compartment boundaries, then the treatment grid inside what remains.
- P — Plan the dose. Use the labelled dosing rules, driven by the compartment you found. Do not over-treat.
- L — Lead expectations. Explain that swelling is normal, that results are gradual, and that multiple sessions are often required.
- E — Evaluate and reassess with photographs and palpation before any retreatment.
These figures reflect Maritza Mejia's clinical practice as taught in Empire Medical Training's hands-on curriculum, together with the current FDA prescribing information and the published literature cited above. Technique is learned under supervision; this article is educational and is not a substitute for training.
Injectors who want to practise assessment, mapping and injection on live patients under faculty supervision can find that in Empire's Kybella and Mesotherapy Training. For necks where the examination finds a mixed picture of fat, laxity and bands, the Neck & Hands Rejuvenation Master Course covers the combination approach.
Related guides in this cluster
Part of Submental and Lower Face Contouring.
 Clinical GuideHow Deoxycholic Acid Works: Adipocytolysis, Inflammatory Clearance, and Why Swelling Is the TreatmentHow deoxycholic acid causes adipocytolysis, why the inflammatory swelling that follows is the clearance mechanism, and what that change
 Clinical GuideThe Submental Pinch Test: Distinguishing Fat from Skin Laxity Before You Open a VialThe submental pinch test separates treatable fat from skin laxity. Maritza Mejia's thumb-and-index technique, thickness bands, and the
 Clinical GuideSubmental Anatomy for Deoxycholic Acid: Compartments, the Submandibular Extension and the Marginal Mandibular NerveThe safety anatomy of the neck for injectors — preplatysmal versus subplatysmal fat, the submandibular extension, and where the margina
Train with Empire
This guide is clinical education. The technique behind it is taught hands-on, on live patients, with faculty beside you.
Explore Complete Dermal Filler Training →Disclaimer
This article reflects the clinical opinions and experience of Maritza Mejia, FNP, an independent faculty member contributing to Empire Medical Training's curriculum. The views expressed are the author's own and do not necessarily represent those of Empire Medical Training.
It is professional education, not medical advice, and is no substitute for hands-on training or independent clinical judgment. Licensed clinicians remain responsible for their own patient selection, technique and outcomes, for verifying current product labelling, and for practising within their scope and applicable law. Empire Medical Training accepts no liability for reliance on this content.
 Claim Your Prize!