






Facial palpation assessment is the part of the consultation that happens with your hands, and in most practices it does not happen at all. The patient is looked at, photographed, discussed and injected — and at no point does anyone establish what is actually under the skin of this particular face.
Anatomy is dynamic. Faces move, they swell, they scar, they descend and they compensate. A diagram is a still image of a solid, variable, moving object, and it is a perfectly good way to learn what the structures are called. It is not a way to find out where they are in the person sitting in front of you. For that you need two things a page cannot give you: touch the patient, and watch them move.
This is the reference for both.
Part one: what your hands find
Palpate in a consistent order, both hands at once, equal pressure on each side, patient upright and then supine. Warm hands. Tell the patient what you are doing and why — I'm feeling the bone under here, because that's what everything above it is sitting on — because a patient who understands the examination understands the plan that comes out of it.
Bone, first. Run the orbital rim and find the step-off. The population pattern says recession concentrates superomedially and inferolaterally while the central rim holds. Your patient may or may not follow it, and the only way to know is to feel the edge. Then the margin of the pyriform aperture, the malar eminence, the zygomatic arch, the mandibular border along its length, the antegonial notch, the mental protuberance. You are mapping the platform. Everything you decide about projection depends on where that platform actually is, not on where a mean CT measurement says it should be.
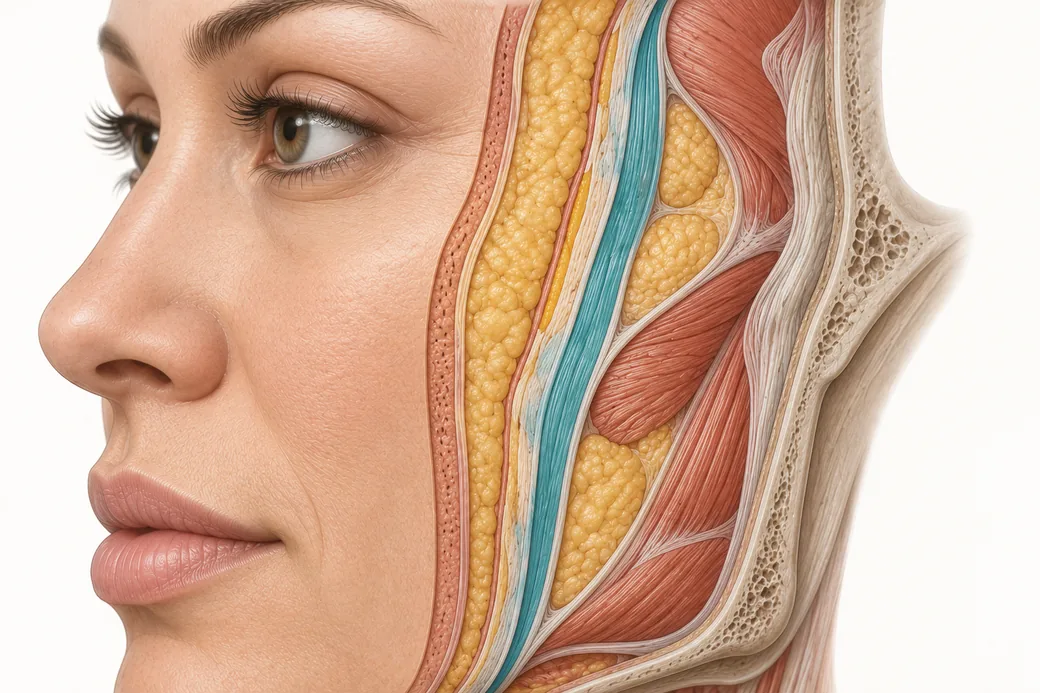
Compartment boundaries. The subcutaneous fat is partitioned by fibrous septa running from superficial fascia into the dermis, and some of what gets called a retaining ligament is simply where two of those septa fuse (Rohrich RJ, Pessa JE. Plastic and Reconstructive Surgery. 2008;121(5):1804–1809). You can feel the change in density as you cross one. More usefully, you can feel the difference between a fold with a sharp, tethered superior edge — a boundary that tissue has stacked against — and a soft, gradual contour change, which is a volume finding. Those two folds look similar and mean completely different things.
The layers, as resistance. Pinch to isolate skin and subcutaneous tissue from what lies beneath, and note how much moves independently. This is also how you assess the envelope: recoil on release, and how far the superficial layer travels before it meets restraint.
Vessels. Take the pulse where you can find it — the facial artery at the anterior border of the mandible, the superficial temporal artery in front of the tragus. Two seconds each, and it puts a real vessel in a real position in this face, which is information a map cannot supply. Regional vascular anatomy and danger-zone territory are covered in their own reference; the point here is simply that palpating a pulse is part of the examination, not an optional extra.
Fluid versus volume. Press and release. Fluid compresses and refills; volume does not behave that way. Malar mounds, festoons and diurnal swelling declare themselves under a fingertip in a way they may not in a photograph.
Muscle bulk and tone. Ask for a clench and palpate the masseter — bulk, symmetry and the position of the anterior border, all of which matter before any masseter or bruxism plan. Feel frontalis on brow elevation, mentalis on chin raise, and orbicularis oris on a purse. Muscle is the layer you can least reliably see and most reliably feel.
Previous product and scar. This is the finding palpation catches that nothing else does. You cannot see filler placed two years ago by someone else. You can very often feel it — a firmness where the tissue should be compliant, a discrete nodule, an area that does not move with its neighbours. Patients frequently under-report their treatment history, not dishonestly but because they do not remember what was placed where. Your hands are the history you can trust.
Asymmetry. Both sides, simultaneously, same pressure, same landmark. Sequential palpation of one side and then the other is far less sensitive than doing them together, and asymmetry you do not find before treatment becomes asymmetry you own afterwards.
Part two: watching the face move
Static assessment tells you about structure. Only animation tells you about behaviour, and behaviour decides most neuromodulator questions and a great many filler ones.
Run a consistent animation set on every patient. Mine is nine positions and it takes under two minutes:
- Conversational rest — not "relax your face," which produces a posed neutral. Just look at them while they are talking to you.
- Full smile, teeth showing.
- Social smile, closed.
- Glabellar frown.
- Maximal brow elevation.
- Forced squint.
- Lip purse.
- Chin raise / mentalis contraction.
- Forced lower-face grimace, which recruits platysma.
What you are looking for across those nine:
Which line is still dynamic and which has become fixed. A crease that disappears completely at rest is a movement problem. One that persists is a structural or surface problem wearing a movement disguise. This single distinction reorganises the whole plan, and it is covered in detail in our reference on dynamic versus static wrinkles.
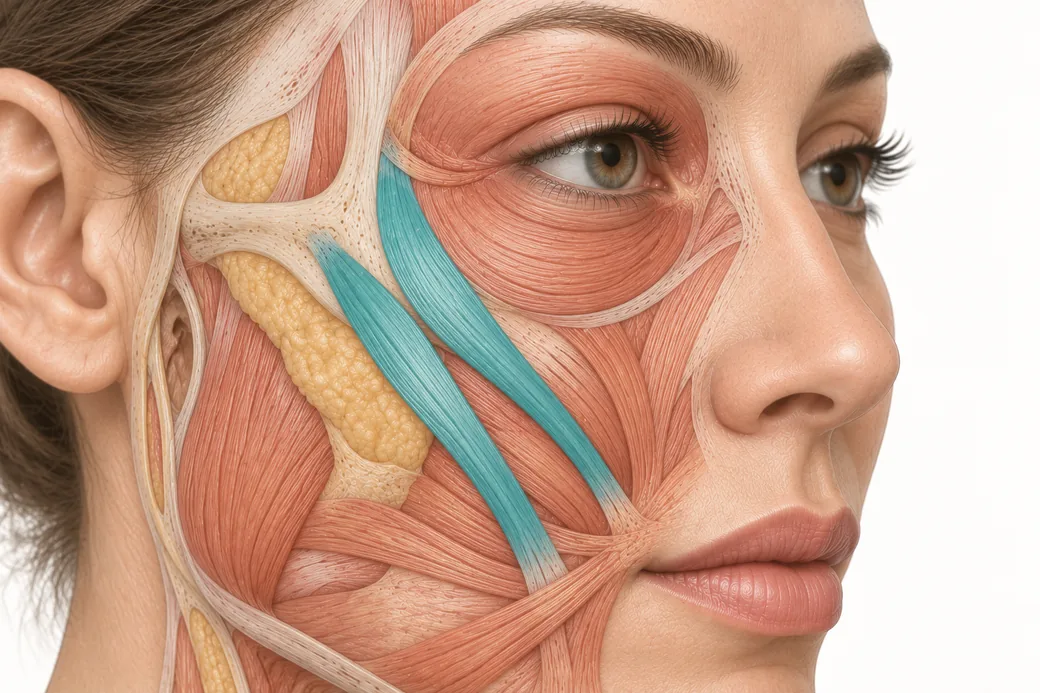
Recruitment and dominance. Which depressor is winning at the oral commissure. Whether the smile is driven more by zygomaticus or by levator labii superioris alaeque nasi. Where gingival show appears and at what point in the smile. A standard facial muscle chart tells you what is there; animation tells you what this patient uses.
Compensation, which is the finding people miss. The commonest is chronic frontalis recruitment compensating for brow or lid heaviness. The patient does not know they are doing it. Ask them to close their eyes, relax fully, then open without lifting the brows, and watch what the brow position actually is. Treat a compensating frontalis without having identified it and you unmask the heaviness it was hiding — at two weeks, in front of a patient who was previously happy.
Baseline asymmetry. Every face is asymmetric. Find it, point it out to the patient in the mirror, and document it, all before anything is injected. An asymmetry identified at the consultation is a feature of the patient. The same asymmetry noticed at the two-week review is a complication of your treatment, at least in the patient's mind.
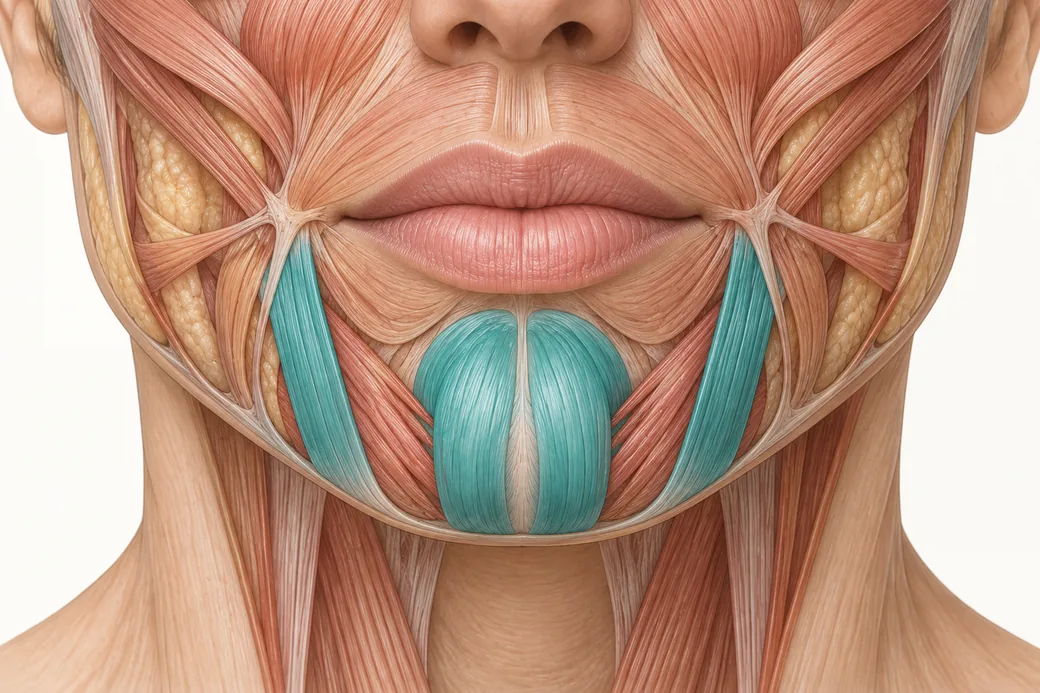
Function during speech. Ask an open question and watch the lower face while they answer. Depressor anguli oris, mentalis and orbicularis oris behave differently in speech than they do on command, and perioral plans made only from posed movements miss things that matter to the patient every day.
Where the skin folds and where it does not. Animation shows you the crease lines that will eventually etch, which is a prevention conversation rather than a correction one.
Part three: repeat it supine
Both examinations change when gravity does. Lie the patient flat and look again.
A face that substantially reorganises supine is telling you the dominant problem is position and support. A face that looks the same is telling you it is contents. The same applies to palpation — folds that were tethered and firm upright can become soft and unremarkable lying down, which is a descent signature.
Two minutes, no equipment, and it resolves a question that otherwise gets answered with product.
What goes in the record
Palpation and expression findings are worth writing down, and almost nobody does it. Three lines is enough: what you felt that was not expected, which animation positions were abnormal or asymmetric, and what changed supine.
Still photography is a separate discipline with its own standardisation requirements, covered in its own resource in this programme, and it should be running alongside all of this. What I would add operationally is a few seconds of video of the animation set, taken on the same device under the same conditions. A still cannot record compensation. Video can.
This reflects Melissa Pulcini-Buttine's clinical practice as taught in Empire Medical Training's hands-on curriculum. Technique is learned under supervision; this article is educational and is not a substitute for training.
Where the hands get trained
You cannot learn any of this from an illustration, and that is not a criticism of illustrations. A drawing teaches you names, order and relationships, and you need all three. What it cannot teach is the feel of a transition between two layers, the resistance of a septum, the distance from skin to periosteum in a particular region, or the range of normal variation — which is much wider than any single diagram implies.
That is the gap Empire's anatomy curriculum is built to close. Special Anatomical Cadaver Aesthetics Training puts the layers in your hands in tissue, so that depth becomes a felt distance rather than a number, and so that variation stops being a word in a textbook and becomes something you have personally encountered several times in an afternoon. Anatomical Based Aesthetics Training builds the same three-dimensional understanding around the regions you treat.
The reason we teach it this way is the why. Points and technique are learnable in a day and they transfer poorly to the face that does not match the diagram. Understanding why a structure sits where it does — and having felt it — is what lets you adapt when the patient in your chair is the variant. That is what separates an injector who knows how from one who knows why, and it is the difference that shows up in both safety and consistency of results. Full-face assessment and treatment planning built on that foundation is covered in Complete Facial Aesthetic Training.
What changes on Monday
Touch every patient. If your consultation currently has no palpation step, add one — and give it a fixed order so it happens the same way every time.
Run the same nine animation positions on everyone, in the same sequence, so that you build a reference for normal across your own patient population rather than assessing each face from scratch.
Look for compensation specifically, before you look at anything else in the upper face.
Find and demonstrate baseline asymmetry at the consultation, in the mirror, with the patient watching.
And repeat both examinations supine before you decide whether the problem is position or contents.
Confidence through anatomy is not a slogan. It is the practical consequence of having felt the structures you are injecting around, in enough faces to know what normal variation looks like.
About the author. Melissa Pulcini-Buttine, PA, has practised as a physician assistant for two decades and has taught anatomy and physiology for approximately fourteen years. She is a faculty member at Empire Medical Training and the founder of an aesthetics practice in Greenwich, Connecticut.
Related guides in this cluster
Part of Facial Muscle Anatomy for Neurotoxin.
 Clinical GuideMost Neurotoxin Complications Are Diffusion, Not Misplacement — Rethinking Root CauseMost neurotoxin complications come from diffusion into an adjacent muscle, not from injecting the wrong site. Here is how to tell which
 Clinical GuideThe Crow's Feet Trap — How Chasing Lateral Cheek Lines Reaches the ZygomaticusA zygomaticus botox complication after crow's feet treatment has one usual cause — chasing lateral cheek lines too low and too deep. Th
 Clinical GuideDepressor Anguli Oris, DLI and Mentalis — Three Overlapping Muscles, Millimetres ApartDepressor anguli oris anatomy is a depth problem, not a map problem. The DAO, DLI and mentalis overlap in layers, and confusing them al
Train with Empire
This guide is clinical education. The technique behind it is taught hands-on, on live patients, with faculty beside you.
Explore Botox Training & Certification →Disclaimer
This article reflects the clinical opinions and experience of Melissa Pulcini-Buttine, PA, an independent faculty member contributing to Empire Medical Training's curriculum. The views expressed are the author's own and do not necessarily represent those of Empire Medical Training.
It is professional education, not medical advice, and is no substitute for hands-on training or independent clinical judgment. Licensed clinicians remain responsible for their own patient selection, technique and outcomes, for verifying current product labelling, and for practising within their scope and applicable law. Empire Medical Training accepts no liability for reliance on this content.
 Claim Your Prize!