







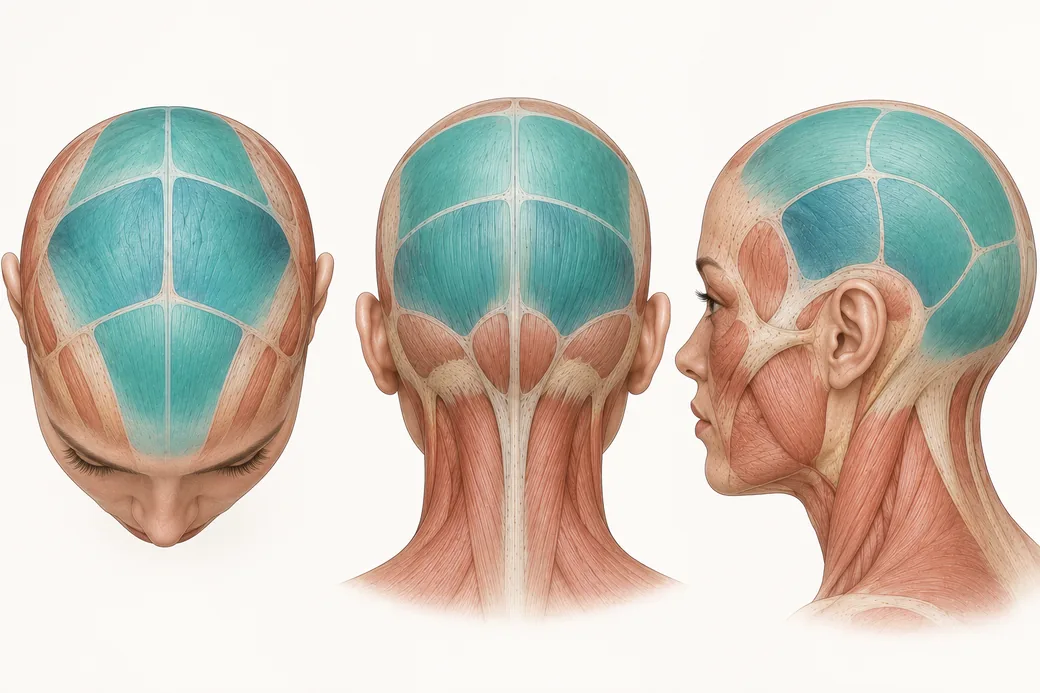
There is a problem with scalp injection that does not exist anywhere else in aesthetic practice: you cannot see where you have already been.
A facial injection leaves a visible wheal, a bleb, a landmark. On a haired scalp, under hair, through a field of 60 or 80 entry points, the record of what you have treated disappears within seconds. Without a system, the last third of a treatment is guesswork, and the guesswork is not random — it clusters. Clinicians over-treat where the hand naturally returns and under-treat the periphery.
A PRP scalp injection pattern exists to solve exactly that. Tatiana Sarmiento's description of her own method makes the purpose explicit: "If I want to treat the front of the scalp, I make a straight line toward the back. That way I know where I injected already and I don't go back to the same area."
That single sentence is the entire principle. The pattern is not a ritual. It is a coverage proof — a geometry that makes it structurally impossible to miss a region or double-dose one, because the sequence itself tells you where you have been.
Map before you load
The mapping step happens before the syringe is in your hand, and it happens with the patient sitting upright in the same position used for the baseline photographs.
Define the treatment field and write it down. Not "the scalp" — the specific regions: frontal hairline and the first few centimetres behind it, the mid-scalp and central part, the vertex, and any discrete patches. These should correspond to the regions you photograph, so that the treated area and the measured area are the same area. Standardised photographic assessment of male pattern hair loss is conventionally organised around distinct scalp regions — vertex, anterior and mid-scalp, frontal and temporal hairlines — for exactly this reason (Olsen et al., J Am Acad Dermatol, 2012;67(3):379–386).
Then decide, before you start, how much volume goes into each region. Total preparation volume divided across regions, and regional volume divided across injection points, gives you dose per point. Injectors who do not do this arithmetic in advance run out of preparation before they reach the vertex, and then compress the last region — which is precisely the region most patients are asking about.
This is the same discipline that makes facial treatment mapping reproducible; the logic behind working from a written chart rather than from memory is set out in Empire's material on the botox face chart, and it transfers directly to the scalp.
The three patterns, and what each is for
Straight linear passes, front to back
The workhorse pattern for diffuse patterned loss across the frontal and mid-scalp.
Begin at the frontal border of the treatment field. Inject along a straight line running anterior to posterior. Complete the line. Then step laterally by your chosen spacing and run the next line parallel to the first, in the same direction.
The reason this works is that the completed lines accumulate as a visible, countable record of progress across the field. You are not remembering points; you are remembering lines. At any moment you can state exactly which portion of the field is done — everything medial or lateral to the last line you finished.
Tatiana uses the same approach at the back: "That's my injection technique — the one I do in the front and in the back."
Retrograde linear passes
The retrograde pass — advancing the needle, then depositing while withdrawing — distributes a small volume along a track rather than depositing it as a single bolus at a single point.
Two advantages on the scalp. It spreads dose along a line rather than concentrating it, which suits a diffuse target where the goal is coverage rather than a focal effect. And it reduces the number of entry points required to cover a given area, which matters for patient comfort across a field that may take 60 or more punctures with a point-by-point technique.
Tatiana describes combining this with the circular approach for defined areas: "You can start injecting in a circular motion, giving the straight retrograde linear injections in all this area, and you will fill all this area at the same time."
Circular patterns for defined patches
Where the target is a discrete, bounded area rather than a diffuse field, the linear grid is the wrong geometry — it treats the bounding rectangle rather than the patch.
For a defined patch, work the perimeter first, then spiral inward toward the centre with progressively smaller circuits, laying retrograde linear passes along the way. The closed boundary is what makes this a coverage proof: once the perimeter is complete, everything inside it is the remaining field, and the inward spiral cannot leave an untreated island.
Temporal recession: work toward the midline
For the receding temporal region, Tatiana treats directionally: "The retraction of the hair right here — it's the same as I did before. I go and inject toward the midline."
Directionality matters here because the temporal region has an irregular, receding border rather than a straight one. Starting at the recession border and working consistently toward the midline means the irregular edge is treated first, while your dose accounting is still exact, and the regular interior is treated last.
Spacing, and why the interval has to be decided in advance
Whatever pattern you use, the spacing between injection points — and between adjacent lines — is what converts a pattern into actual coverage.
Decide it before you start, state it in your protocol, and keep it constant between sessions for the same patient. Two reasons. First, a spacing decided by feel drifts wider as the operator tires, and it drifts wider in exactly the regions treated last. Second, if you change spacing between sessions, you have changed the delivered dose density, and you can no longer interpret the difference between session one and session four.
This is also where the dose arithmetic closes: volume per region ÷ number of points in that region = volume per point. If the answer is a volume you cannot reliably deliver with your syringe, your spacing is too tight or your preparation volume is too small. Fix it on paper, not mid-treatment.
Angle, bevel and depth
Tatiana teaches a consistent needle discipline for scalp delivery.
Syringe and needle. A 1 mL syringe and a 30-gauge needle for scalp and facial delivery. A small-barrel syringe gives the control needed to deliver fractions of a millilitre reproducibly; a wider barrel makes small-volume accuracy a matter of luck.
Angle. A shallow approach — she teaches maintaining a 10 to 15 degree angle to the scalp surface. A shallow angle keeps the needle travelling within the plane rather than driving through it, which is what makes depth controllable at all. At a steep angle, small variations in hand pressure translate into large variations in depth.
Bevel orientation. Bevel up.
Depth. Her practical rule is to insert only to the depth of the bevel rather than advancing the needle further: "You don't need to insert the entire needle. You can just give little insertions… if you insert to the bevel of the needle, that is the right depth to inject the PRP into the scalp."
That bevel rule is the usable teaching, and it is deliberately given here as a technique rather than as a millimetre figure. The specific depth measurements in the source teaching could not be reconstructed reliably, and inventing a number would be worse than describing the method. What the rule achieves is consistency: the bevel is a fixed physical feature of the needle, so "to the bevel" delivers the same depth on the sixtieth injection as on the first, regardless of how tired the operator is.
These figures and techniques reflect Tatiana Sarmiento's clinical practice as taught in Empire Medical Training's hands-on curriculum. Technique is learned under supervision; this article is educational and is not a substitute for training.
Chart the map, not just the treatment
A scalp treatment note that says "PRP to scalp, 6 mL" is not a record. It cannot be repeated, compared or audited.
Record instead:
- The regions treated, named consistently with your photographic regions
- The pattern used in each — linear front-to-back, circular, retrograde
- Spacing between points and between lines
- Volume per region, and volume per point
- Needle gauge, angle and depth rule
- Total volume delivered, and any volume left unused
- A marked diagram. A simple scalp schematic with the treated field outlined and the pattern drawn on it takes twenty seconds and makes the next session reproducible by you or by a colleague
The value of the map is not only reproducibility. It is that a patient who does not respond can be assessed against what was actually delivered — whether the non-responding region was under-dosed, under-covered or missed entirely. Without the map, a non-response is unexplainable, which means it is uncorrectable.
Where coverage actually fails
Four failure modes, all of them systematic rather than random:
The periphery gets thin. Operators slow down and widen spacing at the edges of a field. The edges are frequently the transition zone the patient cares most about.
The vertex gets what is left. If the vertex is treated last and volume was not apportioned in advance, it receives the remainder rather than its share.
Position changes mid-treatment. If the patient's head moves between regions, the geometry you were tracking no longer maps to the anatomy. Reposition deliberately and re-orient to a landmark before continuing.
The pattern changes between sessions. A linear grid in session one and freehand in session three means the delivered dose density differs between sessions, and the comparison between them is meaningless.
What to do differently
- Define and write the treatment field before drawing blood, using the same regions you photograph.
- Apportion total volume by region before the first injection.
- Choose one pattern per region — linear for diffuse fields, circular-inward for defined patches — and complete each region before moving on.
- Fix spacing in advance and hold it constant across sessions.
- Use the bevel as your depth reference so that depth does not drift across a long treatment.
- Draw the map in the chart.
Injection geometry is the part of hair restoration that is learned by doing it under observation, on real scalps, with someone correcting your angle. Empire's Medical Hair Loss Treatment, PDO Threads and PRP Hair Restoration Training and Platelet Rich Plasma Training cover delivery technique alongside preparation. For background on PRP as a hair-loss option, see Empire's overview of platelet-rich plasma for alopecia.
Related guides in this cluster
Part of Regenerative Injectables: PRP and PRF.
 Clinical GuideSingle Spin vs Double Spin PRP: What Actually Changes in the TubeSingle spin vs double spin PRP compared for clinicians — what the second spin concentrates, why volume compensates, and how processing
 Clinical GuideLeukocyte-Rich vs Leukocyte-Poor PRP: Matching Cell Content to the IndicationLeukocyte-rich vs leukocyte-poor PRP explained for clinicians — the cytokine data, the PAW, DEPA and Dohan Ehrenfest frameworks, and wh
 Clinical GuideDiagnose Before You Treat: The Hair Loss Workup That Must Precede PRPThe hair loss workup before PRP, step by step — onset history, pattern recognition, trichoscopy, category-level labs, and the diagnoses
Train with Empire
This guide is clinical education. The technique behind it is taught hands-on, on live patients, with faculty beside you.
Explore PRP & Microneedling Training →Disclaimer
This article reflects the clinical opinions and experience of Tatiana Sarmiento, Empire Medical Training faculty, an independent faculty member contributing to Empire Medical Training's curriculum. The views expressed are the author's own and do not necessarily represent those of Empire Medical Training.
It is professional education, not medical advice, and is no substitute for hands-on training or independent clinical judgment. Licensed clinicians remain responsible for their own patient selection, technique and outcomes, for verifying current product labelling, and for practising within their scope and applicable law. Empire Medical Training accepts no liability for reliance on this content.
 Claim Your Prize!